GIVING CHARACTERS LIFE
So far, we’ve used After Effects to create dynamic title graphics and lower thirds. Now it’s time to push the program even further and try some character animation. This kind of work can be time-consuming, but it’s incredibly fun and rewarding to see static characters suddenly come to life.
Pre-composing and Adjustment Layers
We’ve discussed nesting and adjustment layers in Premiere already; After Effects has some very similar features. Adjustment layers are basically identical in both programs. To create one, go the the Layer drop-down menu at the top of the page and go to New>Adjustment Layer. An adjustment layer the size of your current composition will be created and placed in the timeline. As in Premiere, any effects you apply to the adjustment layer will affect the layers below it. However, After Effects also lets you modify adjustment layers in interesting ways by using the Transform controls and masks. For example, you can use a circular subtract mask on an adjustment layer to create a simple vignette.
Pre-composing layers is the After Effects equivalent of nesting. To pre-compose media in the timeline, select the desired layers (command-click to choose more than one layer), right-click and select Pre-Compose…. A menu will appear with options for re-naming the new composition (probably a good idea), leaving or moving the “attributes” of the layers (choose to move them), adjusting the length of the new composition (choose to do this), and opening the new composition (not necessary).
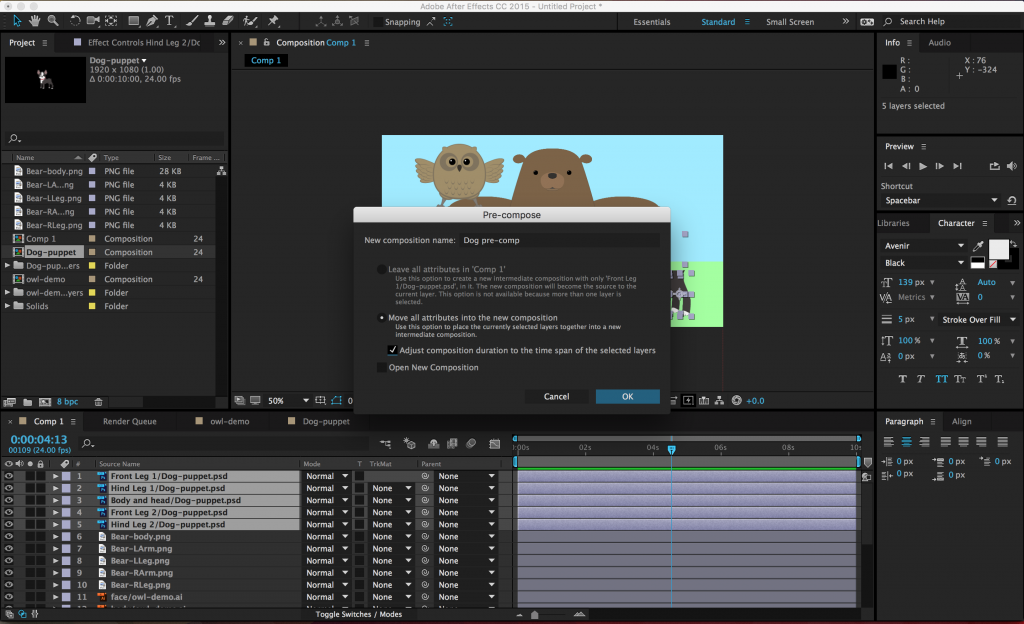
Once the layers have been pre-composed, the new composition will appear in the old composition as a single layer. It will also show up as a new composition in the list of project media. If you double-click on the pre-composition, it will open up in the timeline and preview windows. Pre-composing media is a great way to clean up a chaotic composition (sometimes you just have way too many layers in there), as well as a simple method of applying effects and transformations to multiple layers at once.
Parenting
Parenting is a unique feature in After Effects and it’s incredibly powerful. When you parent one layer to another, the “child” layer will be affected by the scale, position, and rotation of the “parent” layer. Parenting does not affect opacity, effects, or masks.
To parent a layer, you use the Parent section of the composition panel. You can either choose the parent layer from the drop-down menu or use the “pick whip” selector next to it (it looks like a little swirl). A parent layer can have multiple child layers connected to it – and a child layer can have its own child layers – but a child layer cannot have multiple parent layers. That probably sounds confusing, but it should quickly make sense once you start playing with it.
Parenting has some very basic and commonplace applications for things like lower thirds and title design. For example, you could parent a text layer to a solid layer, then animate the solid layer sliding into the frame. The text will keep its position relative to the solid and slide in with it. This keeps your animation consistent and means that you only need to keyframe properties on one layer instead of two.
Under the Layer drop-down menu, you can also create a “Null” object (Layer>New>Null Object). Null objects don’t appear to do anything at first, but they are very useful as parent layers. You can parent several child layers to a null and then affect them all simultaneously.
Animation
Parenting layers together also allows you to do fairly complex character animation in After Effects. To do this, you’ll probably want to use files that have the “puppet” character separated into multiple layers. A simple puppet might have the figure’s arms, legs, head, and body on different layers. Complex puppets will break down the figure more and more – you might have separate layers for parts of the face, finger segments, clothing, and more. Basically, any part of the figure that you want to animate should be on its own layer.
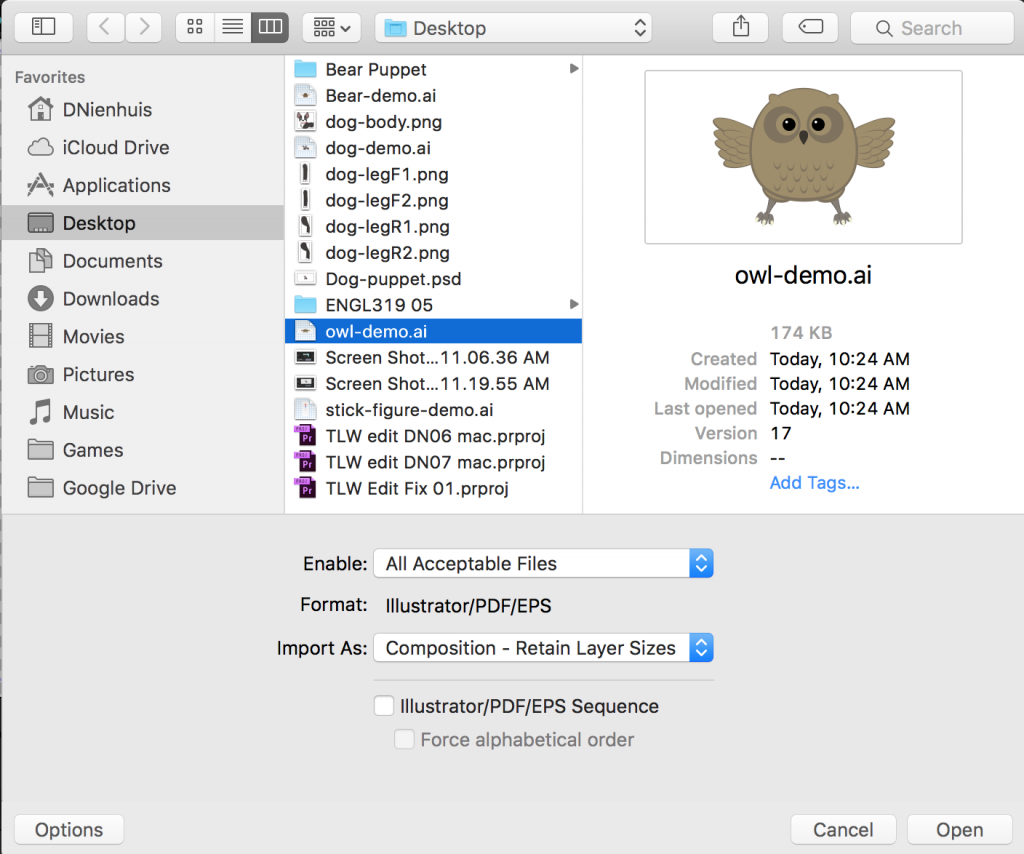
You can import these layers individually, but After Effects is also very good at playing with files created in other Adobe programs. If you create your puppet in Photoshop or Illustrator, you can import those files with their layer structure intact. When you import an Illustrator or Photoshop file, simply change the Import As drop-down from “Footage” to “Composition – Retain Layer Sizes.” (The “Composition” option will work also, but I find “Retain Layer Sizes” easier to work with.) If you’re using a Photoshop file, another screen may appear with the option to keep or merge your layer styles – I tend to choose “merge.” Once you’ve imported the file, it will appear as its own composition with each layer separated out. Note that you will only get the dialog box with these import options if you use command I or File>Import – if you just drag an Illustrator or Photoshop file into the project window, all the layers will be combined into one piece of media.
With the puppet imported, you’ll want to begin parenting the different parts together – but first, you should think about each layer’s anchor point. As we discussed previously, a layer’s anchor point is the point around which the layer scales and rotates. Since we’ll be doing most of our animation using the rotation property, the anchor point is important. For example, a hand rotates around the wrist, the forearm rotates around the elbow, and the upper arm rotates around the shoulder. You can use the “pan behind” tool (its icon has four directional arrows in a dashed box – the shortcut is Y) to grab and move anchor points to their appropriate locations.
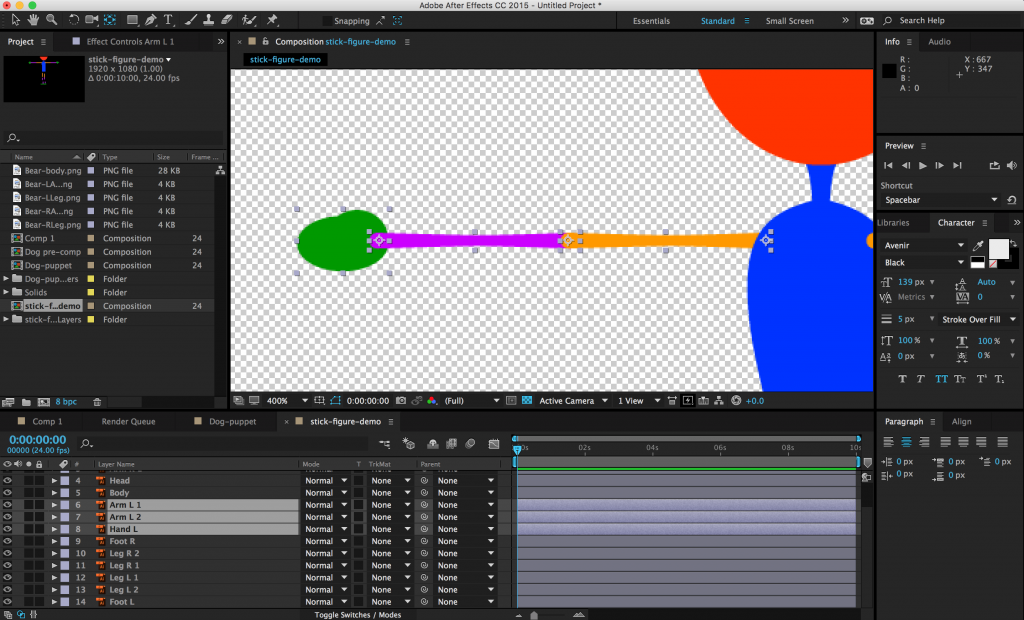
You can then parent the layers accordingly – in this example, the hand is parented to the forearm, the forearm is parented to the upper arm, and the upper arm is parented to the torso. If you do this correctly, rotating the forearm will also move the hand and rotating the upper arm will move all three. I realize that this is probably difficult to visualize, so take some time to play with parenting and anchor points. Imagine your puppet is a marionette and think about where the hinges should be – that’s where your anchor points go. Once the anchor points have been set and the layers have been parented, you can begin animating the puppet by rotating and moving the layers. Don’t forget to turn keyframes on for any properties you want to animate!

Project 7: It’s Alive!
This week, you’ll be doing some simple character animation. Download the media at this link. Inside, you’ll find files for a few different puppets – there are some Illustrator .ai files, a photoshop .psd, and some individual layers.
- Create an animation of at least 10 seconds, using two or more of the puppets in the folder.
- There are no background images in the folder, so either create one, download one, or use media from a previous project.
- It’s not required, but feel free to add music or sound effects for extra points.
Render the finished animation and send me the download link. Animation can be a very time-consuming process, so don’t feel like you need to get too elaborate. That being said, get as creative as you like – if you want to modify the puppets or create your own, do it!


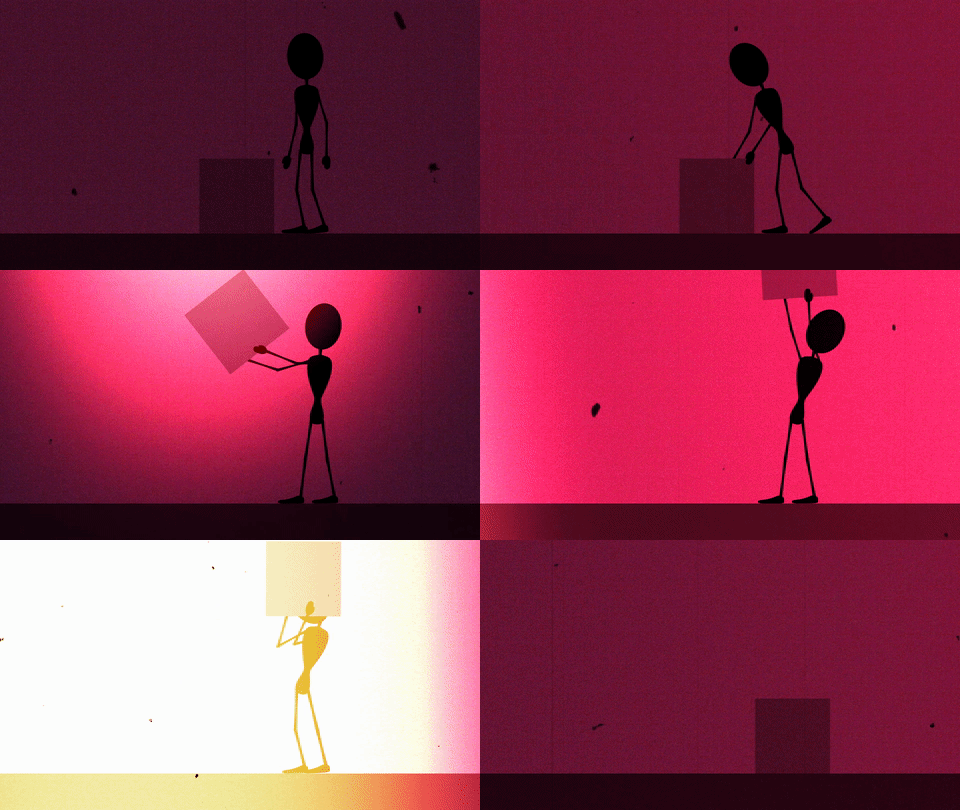
One reply on “Week 9: Character Animation”
[…] process of moving anchor points, parenting layers, and key-framing rotation that we went over in the last lesson. While this technique can achieve very sophisticated results, the animated characters can […]