Categories
Weekly Lessons

Week 9: Character Animation

GIVING CHARACTERS LIFE

So far, we’ve used After Effects to create dynamic title graphics and lower thirds.  Now it’s time to push the program even further and try some character animation.  This kind of work can be time-consuming, but it’s incredibly fun and rewarding to see static characters suddenly come to life.

Pre-composing and Adjustment Layers

We’ve discussed nesting and adjustment layers in Premiere already; After Effects has some very similar features.  Adjustment layers are basically identical in both programs.  To create one, go the the Layer drop-down menu at the top of the page and go to New>Adjustment Layer.   An adjustment layer the size of your current composition will be created and placed in the timeline.  As in Premiere, any effects you apply to the adjustment layer will affect the layers below it.  However, After Effects also lets you modify adjustment layers in interesting ways by using the Transform controls and masks.  For example, you can use a circular subtract mask on an adjustment layer to create a simple vignette.

Pre-composing layers is the After Effects equivalent of nesting.  To pre-compose media in the timeline, select the desired layers (command-click to choose more than one layer), right-click and select Pre-Compose….  A menu will appear with options for re-naming the new composition (probably a good idea), leaving or moving the “attributes” of the layers (choose to move them), adjusting the length of the new composition (choose to do this), and opening the new composition (not necessary).
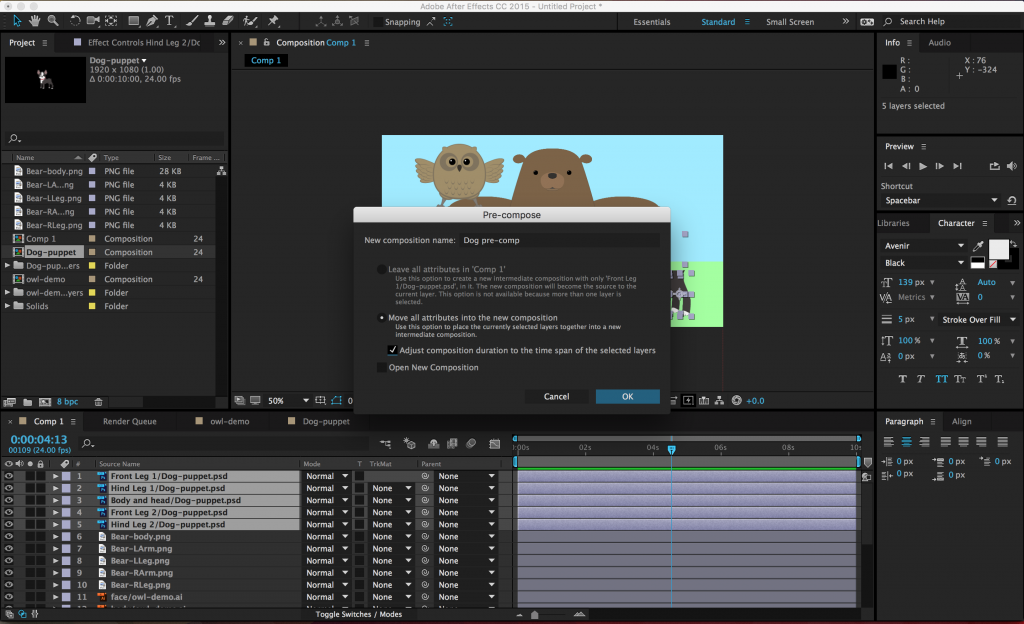
screen-shot-2016-04-05-at-11-06-36-am-1024x624

Once the layers have been pre-composed, the new composition will appear in the old composition as a single layer.  It will also show up as a new composition in the list of project media.  If you double-click on the pre-composition, it will open up in the timeline and preview windows.  Pre-composing media is a great way to clean up a chaotic composition (sometimes you just have way too many layers in there), as well as a simple method of applying effects and transformations to multiple layers at once.

Parenting

Parenting is a unique feature in After Effects and it’s incredibly powerful.  When you parent one layer to another, the “child” layer will be affected by the scale, position, and rotation of the “parent” layer.  Parenting does not affect opacity, effects, or masks.

To parent a layer, you use the Parent section of the composition panel.  You can either choose the parent layer from the drop-down menu or use the “pick whip” selector next to it (it looks like a little swirl).  A parent layer can have multiple child layers connected to it – and a child layer can have its own child layers – but a child layer cannot have multiple parent layers.  That probably sounds confusing, but it should quickly make sense once you start playing with it.

Parenting has some very basic and commonplace applications for things like lower thirds and title design.  For example, you could parent a text layer to a solid layer, then animate the solid layer sliding into the frame.  The text will keep its position relative to the solid and slide in with it.  This keeps your animation consistent and means that you only need to keyframe properties on one layer instead of two.

Under the Layer drop-down menu, you can also create a “Null” object (Layer>New>Null Object).  Null objects don’t appear to do anything at first, but they are very useful as parent layers.  You can parent several child layers to a null and then affect them all simultaneously.

Animation

Parenting layers together also allows you to do fairly complex character animation in After Effects.  To do this, you’ll probably want to use files that have the “puppet” character separated into multiple layers.  A simple puppet might have the figure’s arms, legs, head, and body on different layers.  Complex puppets will break down the figure more and more – you might have separate layers for parts of the face, finger segments, clothing, and more.  Basically, any part of the figure that you want to animate should be on its own layer.

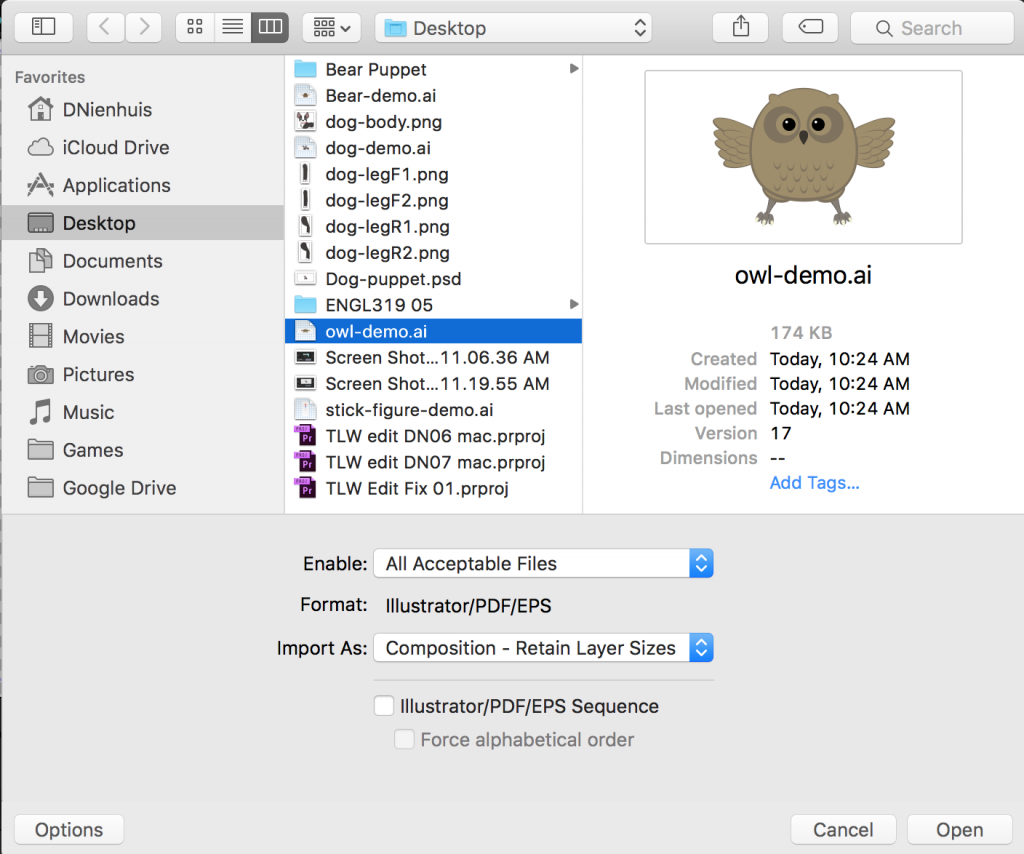
You can import these layers individually, but After Effects is also very good at playing with files created in other Adobe programs.  If you create your puppet in Photoshop or Illustrator, you can import those files with their layer structure intact.  When you import an Illustrator or Photoshop file, simply change the Import As drop-down from “Footage” to “Composition – Retain Layer Sizes.”  (The “Composition” option will work also, but I find “Retain Layer Sizes” easier to work with.)  If you’re using a Photoshop file, another screen may appear with the option to keep or merge your layer styles – I tend to choose “merge.”  Once you’ve imported the file, it will appear as its own composition with each layer separated out.  Note that you will only get the dialog box with these import options if you use command I or File>Import – if you just drag an Illustrator or Photoshop file into the project window, all the layers will be combined into one piece of media.
screen-shot-2016-04-05-at-12-06-46-pm-1024x854

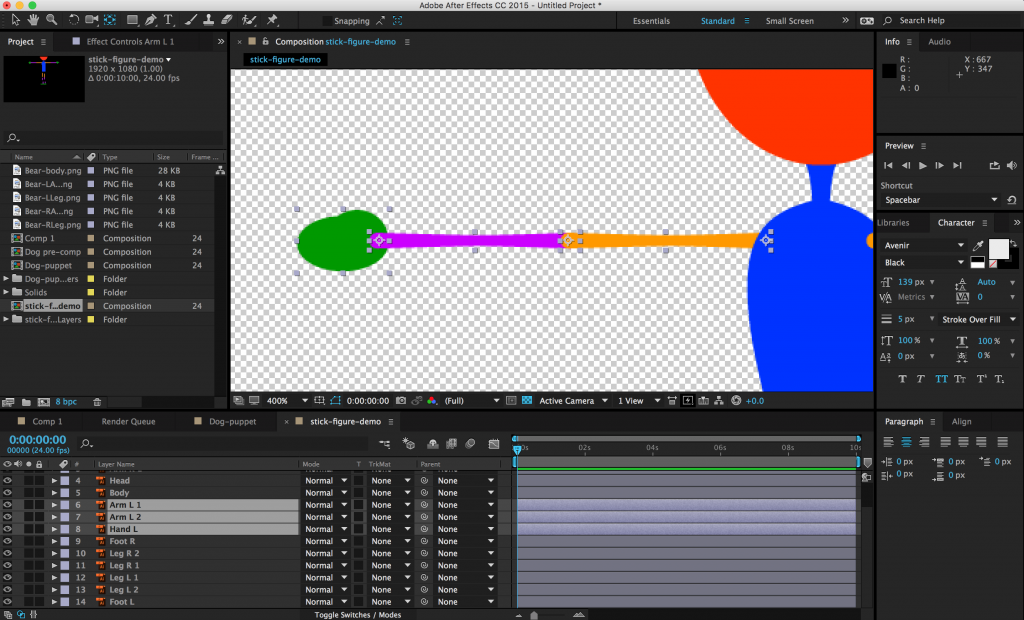
With the puppet imported, you’ll want to begin parenting the different parts together – but first, you should think about each layer’s anchor point.  As we discussed previously, a layer’s anchor point is the point around which the layer scales and rotates.  Since we’ll be doing most of our animation using the rotation property, the anchor point is important.  For example, a hand rotates around the wrist, the forearm rotates around the elbow, and the upper arm rotates around the shoulder.  You can use the “pan behind” tool (its icon has four directional arrows in a dashed box – the shortcut is Y) to grab and move anchor points to their appropriate locations.
screen-shot-2016-04-05-at-12-23-43-pm-1-1024x620

You can then parent the layers accordingly – in this example, the hand is parented to the forearm, the forearm is parented to the upper arm, and the upper arm is parented to the torso.  If you do this correctly, rotating the forearm will also move the hand and rotating the upper arm will move all three.  I realize that this is probably difficult to visualize, so take some time to play with parenting and anchor points.  Imagine your puppet is a marionette and think about where the hinges should be – that’s where your anchor points go.  Once the anchor points have been set and the layers have been parented, you can begin animating the puppet by rotating and moving the layers.  Don’t forget to turn keyframes on for any properties you want to animate!

screen-shot-2016-04-05-at-8-38-43-pm-1024x250

Project 7: It’s Alive!

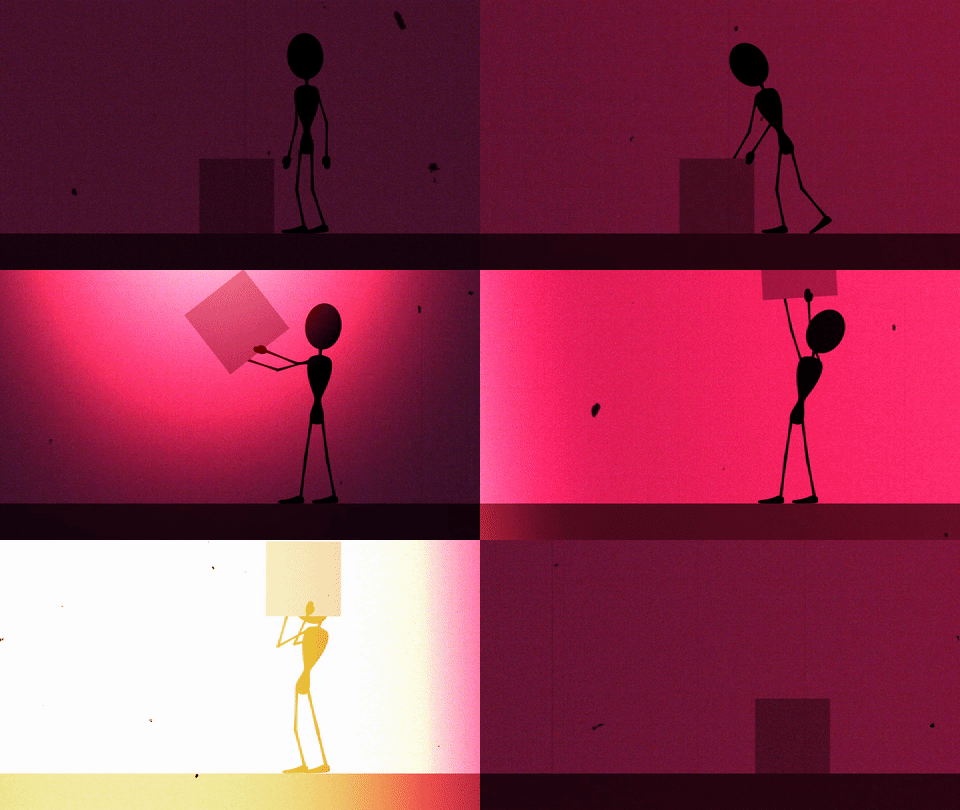
This week, you’ll be doing some simple character animation.  Download the media at this link.  Inside, you’ll find files for a few different puppets – there are some Illustrator .ai files, a photoshop .psd, and some individual layers.

  • Create an animation of at least 10 seconds, using two or more of the puppets in the folder.
  • There are no background images in the folder, so either create one, download one, or use media from a previous project.
  • It’s not required, but feel free to add music or sound effects for extra points.

Render the finished animation and send me the download link.  Animation can be a very time-consuming process, so don’t feel like you need to get too elaborate.  That being said, get as creative as you like – if you want to modify the puppets or create your own, do it!

doggiphyowlgiphyboxgiphy

Categories
Projects

Midterm Project: Images and Voices

https://youtu.be/QujCFznzVQA

https://youtu.be/rAoszt8T4UI

https://youtu.be/HYjAr9mQqh0

https://youtu.be/xmd8Dt_0Gtc


Categories
Projects

Project 6: Thirds and Titles


https://youtu.be/NaCckoYWm2U

https://youtu.be/mOMUQHT_OFI

https://youtu.be/lu-9HRWWe_0

https://youtu.be/sLVspdwc03E

https://youtu.be/Wp4_TAtibTs

https://youtu.be/xw9_6vrlJvE

Categories
Weekly Lessons

Week 8: Digging Into After Effects

ESSENTIALS 2.0

There are a few more key techniques that we need to cover in the After Effects workflow.  Hopefully, you are starting to see what the program can do and how it works.  If you find yourself getting tripped up, it may be helpful to review the Week 7 blog post on After Effects basics.

Manipulating Layers

One very basic action that we haven’t covered yet is the editing of a layer’s in and out-points.  By default, the entire length of a piece of media is dragged down into a composition and you may have noticed that there is no razor blade tool in the After Effects toolbar.  Instead, to trim the beginning of a layer, move the playhead to the desired in-point and hit option [.  Option ] will set the end point.   (Use alt on a PC.)  You can also click and drag on the ends of layers in a composition.

If you don’t hold down option, the [ and ] keys will move the layer without trimming it.  [ will move a layer so that its in-point is at the playhead location.  ] will move a layer so that it’s out-point is at the playhead.  These shortcuts allow you to adjust the length and position of layers in the timeline very quickly, once you’re accustomed to using them.

When you’re moving or trimming layers, it’s obviously important to have your playhead exactly where you want it in the timeline.  You can use the spacebar to play or move the playhead by clicking and dragging it with the mouse.  For precision, you can use page up and page down to move frame-by-frame forwards and backwards.  This is different from Premiere, which utilizes the arrow keys to move the playhead; in After Effects, the arrow keys adjust the position of the highlighted layer.  If you hold shift and press page up or page down, you will move the playhead ten frames instead of one.

You will also probably need to duplicate layers fairly often in After Effects.  This can be done by copy/pasting, but you can also use the command D keyboard shortcut.  You can actually use command D to duplicate all sorts of things in After Effects: shapes, text, entire compositions, and even effects.

One last note about layers: if you double click on a layer in the timeline, it will open that layer in a panel over the composition preview window.  This is actually not where you usually want to work, so if you accidentally double click on something, close the layer panel or click back to the composition preview window.

Easing Keyframes

The ability to keyframe and animate properties is probably After Effects’ most powerful feature; however, that animation may look a little stiff and unnatural at first.  For example, if you use two “normal” keyframes to move a shape across a composition, the shape will begin moving abruptly, travel at a constant speed, and then stop abruptly.  Sometimes, this is the desired effect, but it’s not how things usually move in the real world.  Fortunately, After Effects makes it simple to make animation more natural and dynamic.

screen-shot-2016-03-30-at-3-40-28-pm-1024x213

By default, keyframes in the timeline are diamond-shaped.  This is a standard “linear” keyframe.  If you right-click on a keyframe and move down to the “Keyframe Assistant,” you’ll see three “Easy Ease” options: Easy Ease, Easy Ease In, and Easy Ease Out.  Easy Ease Out “eases out” a property, meaning it will start slowly and then build up speed.  Easy Ease In “eases in” a property, meaning it starts fast and then slows down.  Easy Ease is used for keyframes where you want a property to start fast, slow down, then pick up speed again.  When you choose one of these options, the shape of the keyframe will change: Easy Ease Out is an arrow pointing left, Easy Ease In is an arrow pointing right, and Easy Ease is basically the other two icons combined.

screen-shot-2016-03-30-at-3-40-54-pm-1024x213

Easy Ease sounds complicated, but it should quickly make sense once you start playing with it.  It’s really an essential tool in After Effects; it makes animated properties – especially movement – seem much more natural.  If you’re having a hard time with it, my general rule is this: use Easy Ease Out on the first keyframe in an animation, Easy Ease In on the last keyframe, and Easy Ease on the keyframes in between.

If you want to switch back to a standard linear keyframe, you can command click on it and its shape will change.  If it turns into a circular shape, command click on it again, until it’s back to a diamond.

screen-shot-2016-03-30-at-3-41-28-pm-1024x215

Transfer Modes and Track Mattes

Those of you with Photoshop experience may be familiar with transfer modes.  A layer’s transfer mode affects the way it interacts with the layers below it.  There is a “Mode” section of the composition panel where this can be adjusted.  You may need to hit the “Toggle Switches/Modes” button at the bottom of the panel for it to become visible.

By default, the transfer mode should be set to “Normal.”  There are too many options to go through individually, but they are grouped together into sections.  The section with “Darken” at the top uses the dark areas of the layer to affect what is visible; the section with “Add” at the top uses the light areas.  You should experiment with the transfer modes to see how layers affect each other – you can get some really interesting results with them.

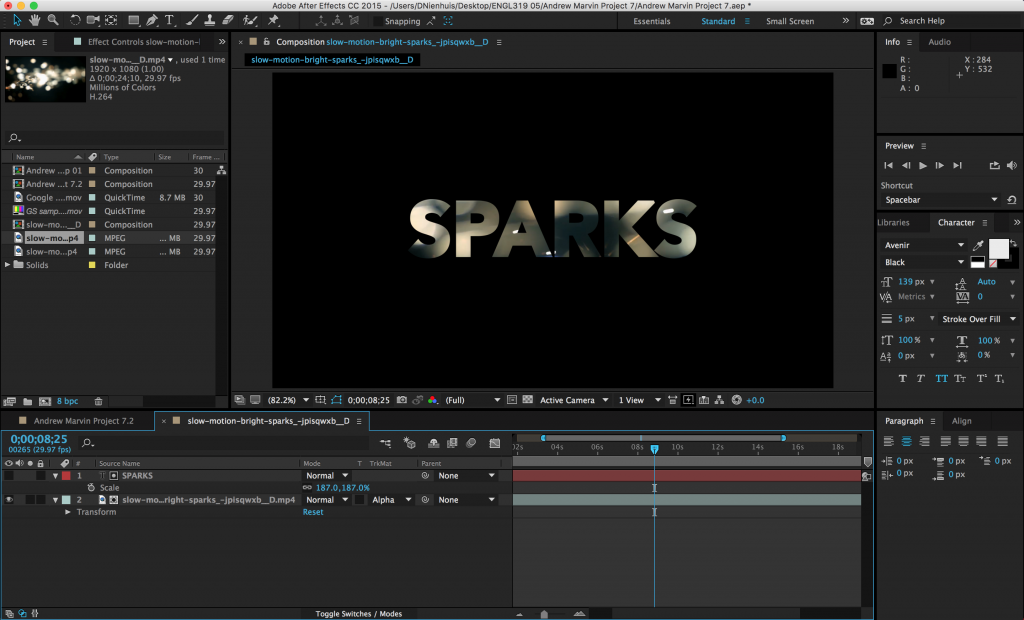
Next to the transfer modes are options for “Track Mattes.”  A track matte tells a layer to look at the layer above it for certain properties.  The “Alpha Matte” and “Alpha Inverted Matte” are particularly useful.  For example, if you put a text layer above a video layer and then set the track matte of the video to Alpha Matte, the video layer will have the shape of the text layer.  Alpha Inverted Matte will cut out the shape of the text.

screen-shot-2016-03-30-at-4-19-06-pm-1024x620

Project 6: Thirds and Titles

Part 1

One thing that After Effects is often used for is the creation of “lower third” graphics.  A lower third is a graphic (usually located in the bottom third of the frame) that contains text information about the subject of the video.  Lower thirds are most often used in interview and documentary footage where the viewer needs to know the name and/or other information of whoever is on screen.

screen-shot-2016-10-12-at-2-22-23-pm screen-shot-2016-10-12-at-4-37-42-pm  screen-shot-2016-10-12-at-4-37-10-pmscreen-shot-2016-10-12-at-2-24-44-pm

This week, we’ll be creating a lower third graphic.  Download one of the videos above and create a lower third for that person.  Here are the parameters:

  • The lower third should be on screen for between five and ten seconds.
  • The graphic should animate on to and off of the screen.  This can be done using opacity, movement, or anything else you like.
  • There should be two lines of text: one of your subject’s name and one of their job or title.  Make something up!
  • Put an easy ease on at least one of your keyframes.

If you need some footage to use as a base for your lower thirds graphics, here are some slow motion clips.  You are also free to find footage or still images on your own.  Render the video at 1920 x 1080 resolution using the H.264 codec and send me a download link!

Part 2

If you did not use After Effects to create a title graphic for your midterm project, I’d like you to create a title graphic for this assignment in addition to a lower third.  Use the slow motion footage as the base to create a title graphic for an imagined project.

  • The composition should be between 10 and 20 seconds long.
  • Since this is a title graphic, some text should be used.
  • Use at least one effect.
  • Keyframe at least one property or effect.

Audio is not required, but you may certainly add some.  Render the title graphic using the same parameters as the lower third and send me a link.  If you already used After Effects to create a title graphic for your midterm, you do not need to do part two of the assignment!

Categories
Blog Posts

Movie Title Design

PLAYING WITH WORDS

Here’s a nice companion piece to the video on Saul Bass that was posted previously.  It features title designer Dan Perri, whose diverse work includes The Exorcist and Star Wars.

Here’s a brief look at some iconic title design throughout the history of cinema – including the work of Perri and Bass.

https://youtu.be/A-BARjeiL-U

If you’re interested in title design, check out the excellent Art of the Title blog, which is comprised of essays, interviews, and analyses on hundreds of television and movie title sequences.