PREMIERE AND AFTER EFFECTS INTEGRATION
One really nice feature of the Adobe suite of programs is how integrated everything is. Earlier in the semester, we discussed how to send audio from Premiere to Audition to do repair work. Premiere can send media to After Effects as well – and vice versa.
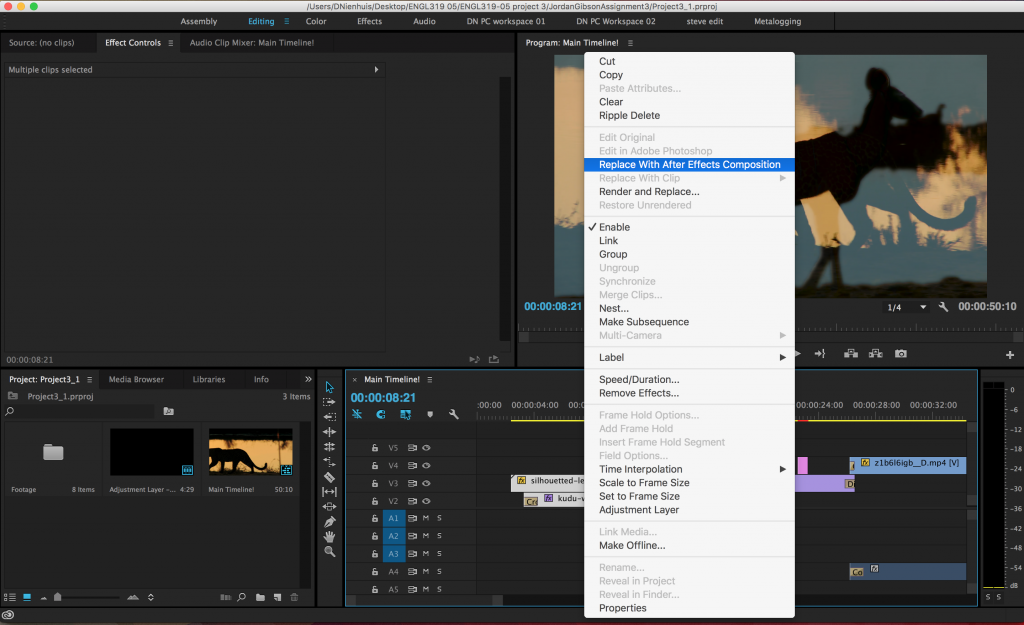
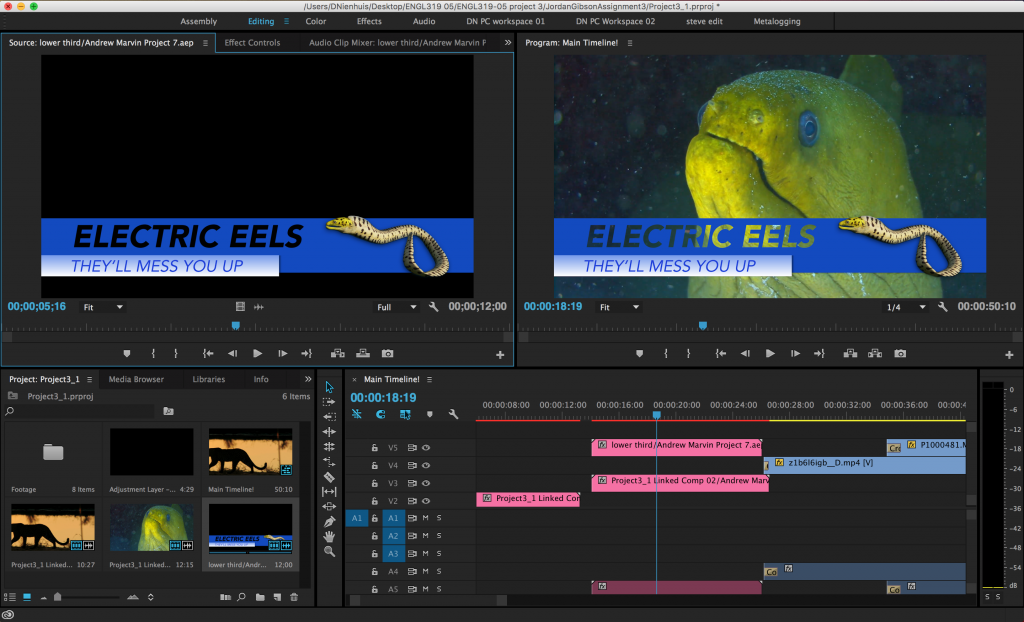
The process is actually incredibly simple. To ensure that everything works well, open up both programs (remember to save in After Effects). In Premiere, highlight the clips you would like to send to After Effects in the timeline panel. Right-click and you should see an option that says “Replace With After Effects composition.” When you choose this option, the highlighted media will be replaced with a single clip in the sequence.
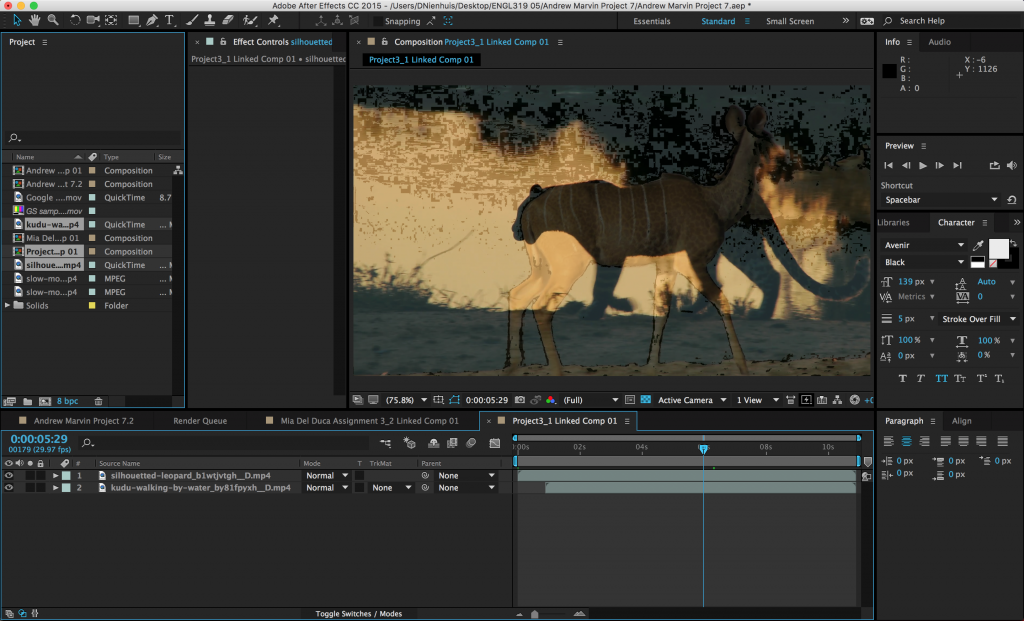
After Effects should open automatically with the selected clips in a new composition (the composition name will end with “Linked Comp”). Even though Premiere and After Effects use different kinds of timelines, the programs do a good job of approximating between the two. If you’ve made adjustments to the clips in Premiere before sending them to After Effects, many of those changes will carry over – things like scale, opacity, and position, as well as some effects. However, things that don’t work the same in both programs – like transitions – will not carry over.
With the media in After Effects, you can manipulate the footage, edit, add text, and animate just as you would for any normal project. As you make changes, the linked composition in Premiere will be affected – there is no need to render or send the footage back. Keep in mind that this process will likely slow down your preview and rendering speeds in Premiere, unless you’re using a very fast computer. When you’re done making changes, you can export the sequence from Premiere as usual.
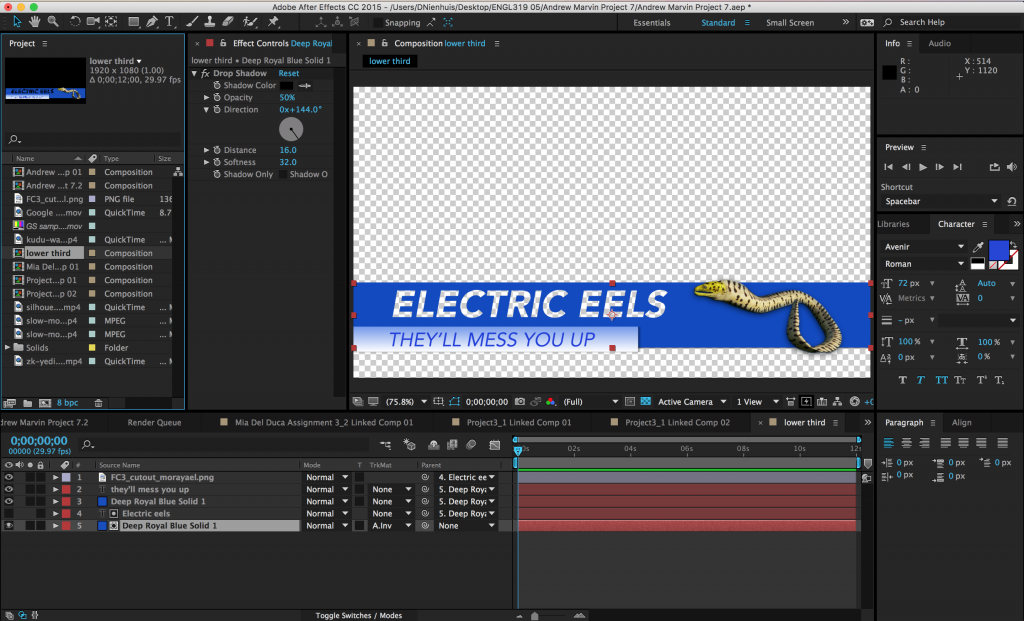
It’s also quite easy to send compositions originating in After Effects to timeline sequences in Premiere. This is very useful for things like titles and lower thirds. Create a composition in After Effects as you normally would. Then simply drag the composition from the list of project media in After Effects to the list of project media in Premiere (you may need to shuffle your program windows around a little to do this). The composition will appear alongside the rest of your media in Premiere and you will be able to add it to sequences in the timeline panel. Again, any changes that you make in After Effects will affect the composition in Premiere.
Rendering an Alpha Channel in After Effects
While the live integration between After Effects and Premiere is very useful, sometimes the most efficient course is to work in the two programs individually – creating graphics in After Effects, exporting them as movie files, and importing them into Premiere. When you do this, you may need to render video with transparent areas (in a lower third, for example). The transparent part of a video file is called its alpha channel.
Because they are compressed, most video formats do not include an alpha channel. If you create a lower third graphic in After Effects and export it using the H.264 compression we’ve been using thus far, the resulting video will be black in the transparent areas.
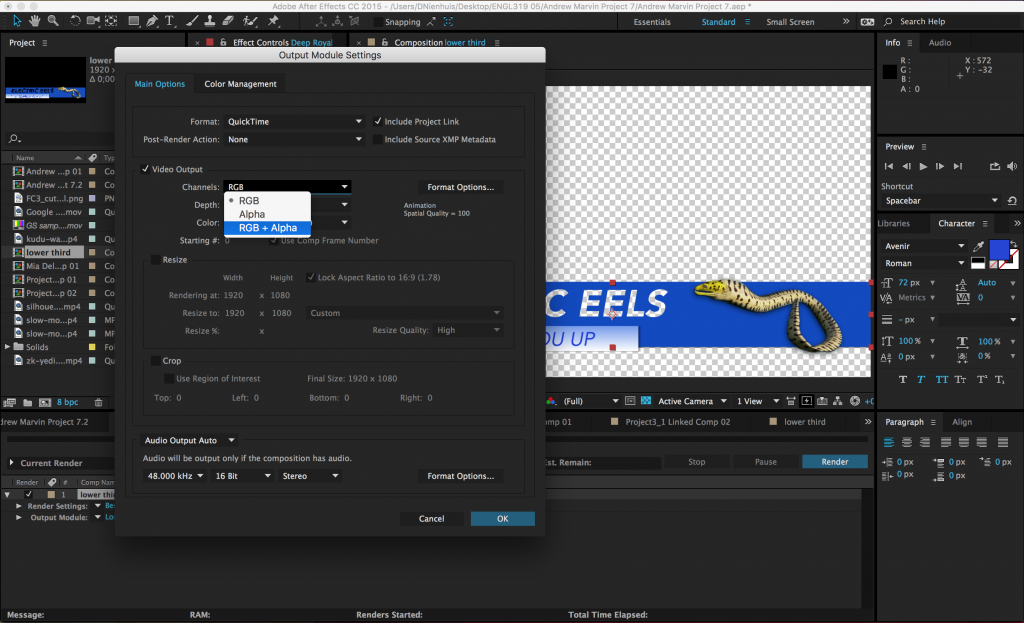
To render video with an alpha channel, send it to the After Effects render queue as usual. Under the “Output Module,” choose the “Animation” codec instead of H.264. In the output module settings window, there is a “Channels” drop-down menu under the “Video Output” section. Certain video codecs (such as Animation) will allow you to choose RGB + Alpha in this menu. RGB + Alpha will output a video with transparency data; RGB will output the video only, with a black background.
Because videos that use the Animation codec are less compressed and contain an additional channel of information, the resulting file sizes are much larger than they are for codecs like H.264. For this reason, I only recommend using an alpha channel on exports where the clip is relatively short.
