3D SHAPES
As I previously mentioned, After Effects can be used to place 2D layers in 3D space, but it can’t be used for advanced 3D modeling. We can, however, create or simulate simple 3D shapes such as cubes and spheres.
Cubes and Boxes
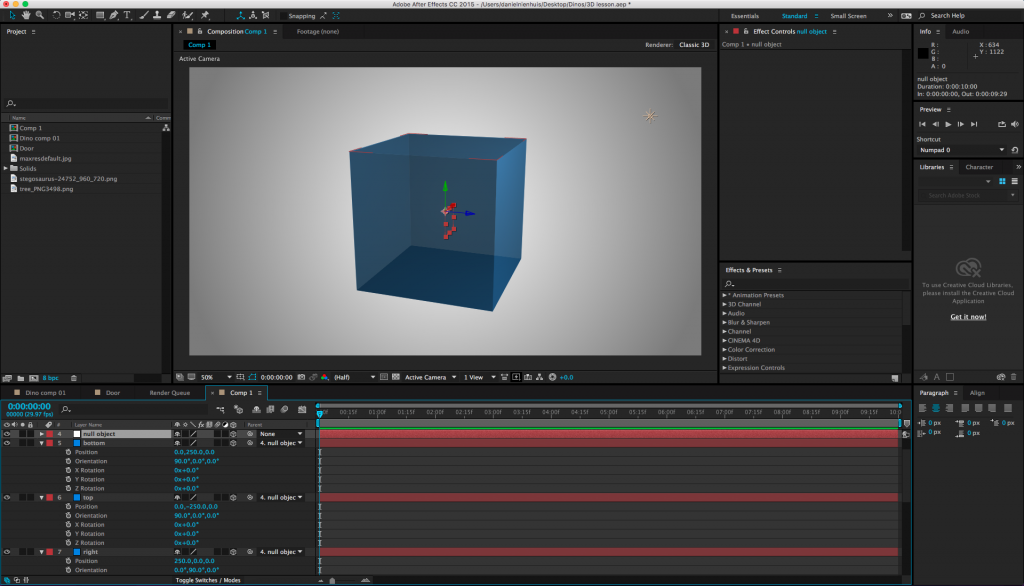
Making a 3D cube in After Effects is quite simple, although the process can be a bit tedious. Construct your shape using solids – when you create a new solid, you can specify the size, so you can create a cube fairly quickly by creating six square solids (one for each side of the cube). Switch the layers to 3D and adjust the orientation (or rotation) and position of each side so that they line up. If, for example, you want to create a cube with sides that are 500 pixels, each side needs to be 500 pixels away from its opposite side.
You can make this process more streamlined by actually doing simple math within the timeline. If your layer needs to move forward by 250 pixels, you can click on number you want to change and type “+250” after it.
Once you have your cube or box created, you may want to move it around your scene. You can do this by parenting the sides to a 3D null object. Create a null (from the top menu, Layer>New>Null Object) and turn on its 3D property in the timeline window. Then parent each of the sides to the null object and use it to position your cube in 3D space. You can play with the opacity and color of the sides and/or add virtual lights to give the shape some definition.

Spheres
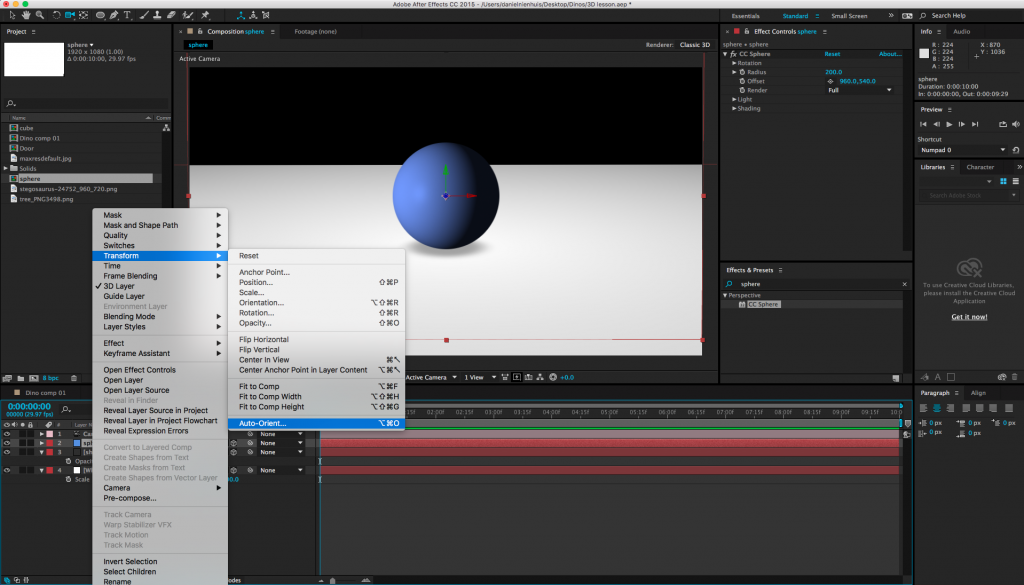
We can’t create spheres in the same way that we create cubes, but we can create a shape that appears to be a sphere. Using either a solid or an image (or even a video) as a base layer, choose “CC Sphere” from the “Perspective” category of the effects. This effect will make any layer look like a sphere, complete with parameters to adjust the lighting and shading. It will still be a flat 2D layer, though, so if you add a 3D camera move, your sphere will look like a disc instead.
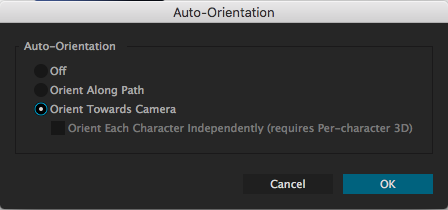
There is a way around this, though. First, set the sphere layer to 3D. Then right-click on the layer and choose Transform>Auto-Orient…, which will bring up a menu with a few options. Choose “Orient Towards Camera” – this will make the layer face the active camera, regardless of where it is. Since spheres look the same from every angle, your flat disc will appear to be 3D.


Remember that since your sphere is still technically a disc, virtual lights won’t affect it the way you might want them to. However, you can fake many of the same effects (shadows, reflections, etc.). For example, you can create a simple feathered shape to give the appearance of a shadow.
You can take this technique much further to create glowing orbs or planets or other complex spherical shapes. If you want to really get crazy, check out this tutorial on Video Copilot. Some things may be unfamiliar, but you should be able to follow along. There are tons of other great tutorials on Video Copilot as well, so check that site out if you want to hone your skills.