https://youtu.be/FxAg1mnSrHY
https://youtu.be/S24-7W8ytOI
https://youtu.be/6z44VAqtic8
https://youtu.be/5Hvt2Z4f9J4
https://youtu.be/iw6CAUOMtG4
https://youtu.be/FxAg1mnSrHY
https://youtu.be/S24-7W8ytOI
https://youtu.be/6z44VAqtic8
https://youtu.be/5Hvt2Z4f9J4
https://youtu.be/iw6CAUOMtG4
COURSE LIST
Here are the F/MS courses meeting next semester. There are some great options, so be sure to sign up as soon as you can. Remember, this course can be repeated on different topics – next semester, this course is focused on animation.
Film/Media Studies Spring 2017
ENFS 130.01 Intro to Film/Media Studies MWF 9-9:52am, M 7-8:52pm Eisenstein
AHLG ARHC EGHU FRST W1
ENFS 130.02 Intro to Film/Media Studies MWF 10-10:52am, M 7-8:52pm Eisenstein
AHLG ARHC EGHU FRST W1
An introduction to the study of moving images on silver screen, television, tablet, and smart phone. Weekly screenings at the Campus Theater of films by everyone from Orson Welles to Andy Warhol will be complimented by critical readings and lots of class discussion.
ENFS 238.01 From Golden Age to Wasteland? MWF 11-11:52am, F 2-3:52pm Sewell
ARHC EGHU DUSC AHLG
This course examines how television became the dominant news and entertainment medium in the USA in the 1950s and 60s, with special attention paid to the representations of race, gender, and what it means to “be American.” A wide variety of television shows will be screened including dramas, sitcoms, and variety shows.
ENFS 245.01 Televisual Culture TR 9:30-10:52am, W 7-8:52pm Sewell
ARHC EGHU AHLG
Why and how do shows like Star Trek, Lost, and Breaking Bad inspire such passionate (or obsessive) fan followings? This course explores this subject in the context of wider debates about the role of audiences and
our media culture in general. Class screenings will include everything from Lost to Doctor Who.
ENFS 248.01/ Intermediality: Italy and Film MW 3-4:22pm, W 7-8:52pm Eisenstein
UNIV 248.01 CCIP
Italy has produced some of the greatest directors, actors, and films in Western cinema, and this IP course focuses on this tremendous cinematic achievement in the context of Italian culture in general.
ENFS 335.01 Audio-Vision: Intermediate Production M 2-4:52pm Meyers
ARHC
A course on sound design in both video and multimedia productions. It will be workshop based, and will stress acquiring practical skills through hands-on experience.
ENFS 337.01 Seminar in Film Theory TR 1-3:52pm Sewell
ARHC EGHU
An advanced seminar on classical and contemporary film theory in which students will learn the major aesthetic, political, and philosophical debates that have shaped how cinema is viewed and integrated in
culture in general.
ENFS 340.01 Film/Media Production Practicum W 3-4:22pm Nienhuis
ARHC
A production course that focuses on animation and the visual effects software suite After Effects. Learn how to create dynamic video content of your own through character animation, title design, motion graphics,
and much, much more.
Got questions? Email the program director Prof. John Hunter at jchunter@bucknell.edu
THE FUTURE OF ANIMATION?
Earlier this year, The Simpsons used animation software from Adobe to incorporate a live segment into an episode. During the segment, fans of the show called in and asked unscripted questions to Homer, who answered – while animated – in real-time.
This was done using a piece of still-in-development software called Adobe Character Animator. Character Animator is included with current versions of After Effects, but launches as a standalone program. It uses web-cam point tracking to map facial movements in real-time. Mouth movements are translated to pre-built shapes, that change and move with the action of the actor. Other gestures, such as blinking or body movements can either be tracked live or mapped to buttons. When a button is pressed, the corresponding gesture is made.
For the segment on The Simpsons, Homer’s voice actor (Dan Castellaneta) responded to questions will being tracked by a camera monitoring his facial movements. Other gestures were controlled by the episode director using a keyboard.
While the humor is a bit hit-or-miss, the technology and execution are certainly impressive. However, the most interesting thing about this may be that the tools used to do so are readily available and accessible. We have Character Animator installed on the computers in the Marts studio and anyone with a Creative Cloud subscription can download it. This is a prime example of the specialized tools of video production and animation becoming increasingly democratized.
You can read more about the Simpsons live animation segment over at Cartoon Brew. Since this is a specialized animation tool, we aren’t covering it in this class – but if you’re interested in learning how to use it, allow me to make a shameless plug for next semester’s Film/Media Studies Production Practicum, which will be focused on animation. We’ll be using After Effects, Character Animator, Illustrator, Photoshop, and even more esoteric tools such as stop-motion.
GETTING SERIOUS ABOUT CHROMA
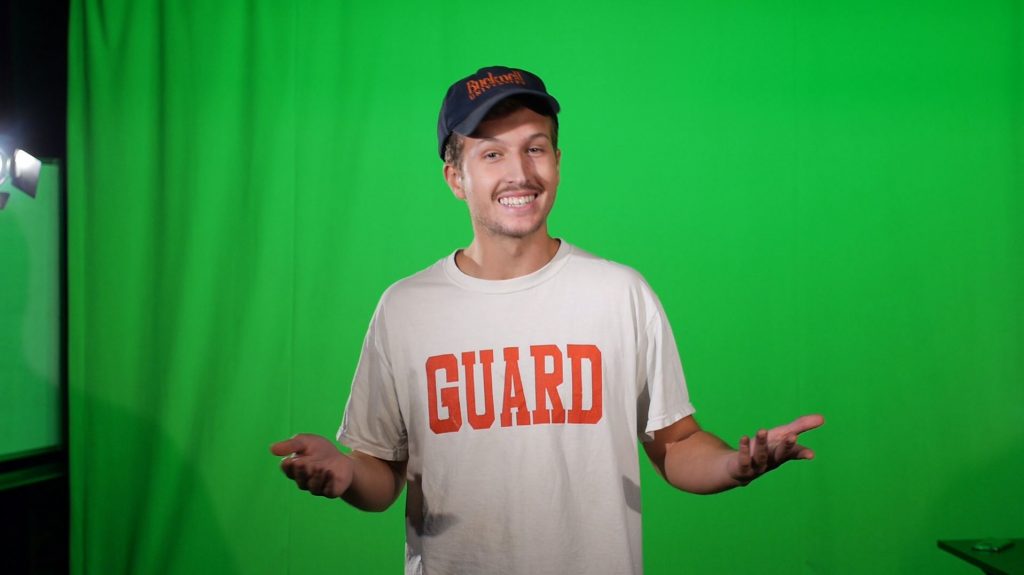
We’ve gone over green/blue screen compositing (or “keying”) in Premiere already, so you should have a pretty solid understanding of the process. While Premiere does a very capable job of keying footage, After Effects has more advanced compositing tools and offers finer control. When I have to put together a green screen shot that is especially complicated or use footage that is challenging I almost always use After Effects.
Masking and Keylight
In Premiere, we used the crop effect to quickly mask out unwanted areas of green screen footage. In After Effects, we can use the mask tool to do the same thing, but with much greater control. Use the pen tool to draw a rough mask around your subject, cutting out any unwanted areas of the frame. The more you can cut out, the less the program needs to color-key, and the better your results are likely to be.
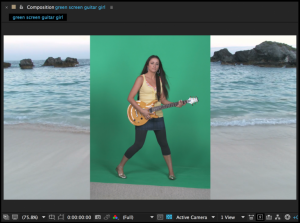
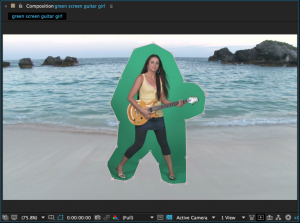
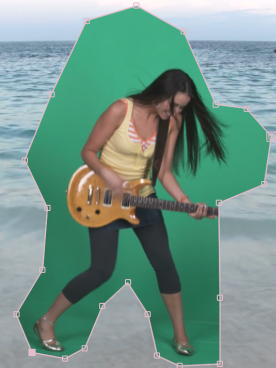 While you want to crop out as much as you can, if you draw your mask too close to the subject being keyed, they may move outside the mask during the clip. If this happens, the subject will be partly cut off. To avoid this, you can animate the shape of the mask. Under the mask properties in the timeline panel you will find “Mask Path.” If you turn keyframes on for this property, you can animate the shape of the mask by dragging its points. Simply go through the footage and change the shape of the mask whenever your subject moves out of it. You may need to shift-click on a mask’s points to select it individually. Once the shape of your mask has been keyframed, it should move around your subject throughout the footage without cutting them off. You can also add a slight feather to the edges of the mask, to help everything blend together.
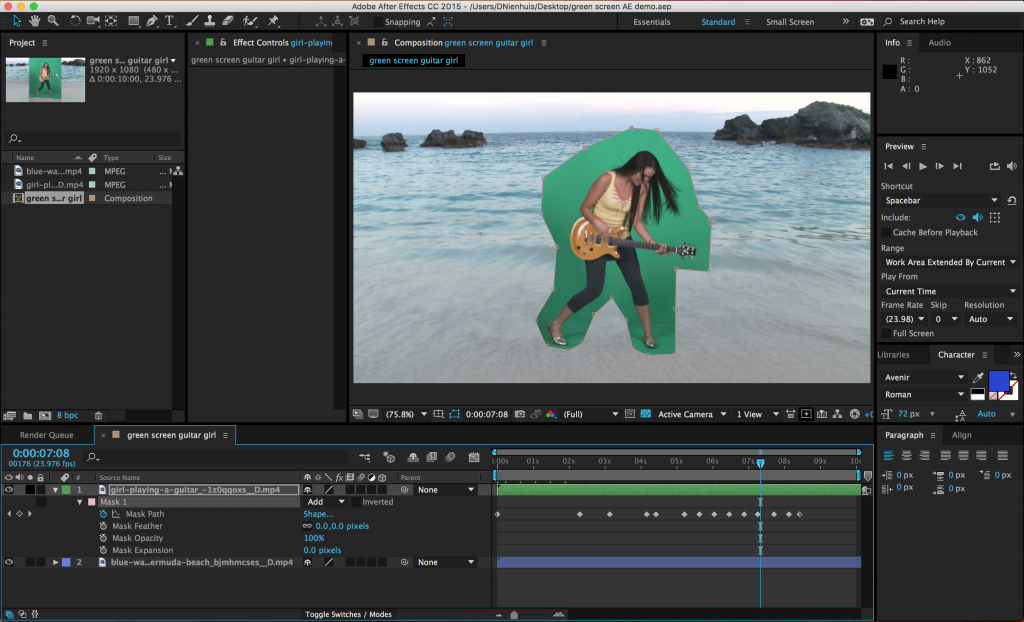
Once you’ve isolated your subject with a mask (and animated it, if necessary), you can begin to actually key the footage. There are lots of compositing options available in the “keying” section of the effects, but your best bet is an effect called Keylight. Keylight is similar to the UltraKey effect in Premiere in many ways. First, select the color of the mask using the eyedropper tool – you should see an immediate effect. Next, change your view mode from “Final Result” to “Screen Matte.” This will give you a black-and-white view of the areas being keyed out – black areas will be taken out, white areas will remain, and anything grey will be transparent. Your goal is to get rid of all the grey areas.
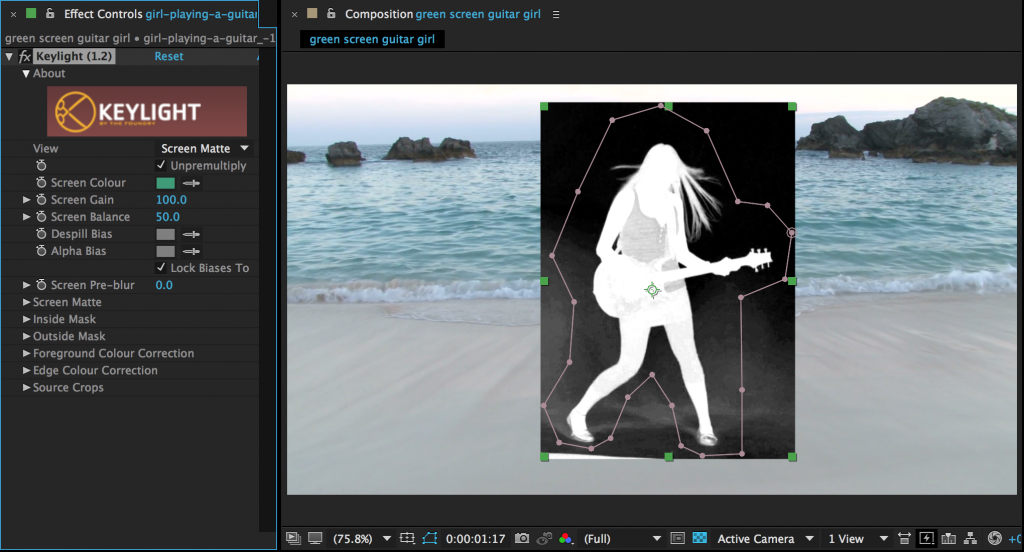
The first effect parameters you should adjust are the “Screen Gain” and “Screen Balance.” Try adjusting each to see if the result improves or gets worse, but don’t worry if you can’t get it exactly right – this is only the first step. Be careful not to lose detail as you adjust the gain and balance. Next, move down to the section of the effect called “Screen Matte.” The two things you want to adjust here are “Clip Black” and “Clip White.” As you turn “Clip Black” up, the dark areas of the screen will get darker. As you turn “Clip White” down, the light areas of the screen will get whiter. You should be able to get your image to only black and white using these parameters. Be careful not to adjust any one thing more than you need to – again, going too far will cause you to lose detail. If you can’t get rid of some of the grey, you may need to add a color correction effect to the media before you try to key it.
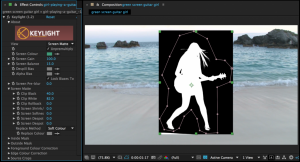
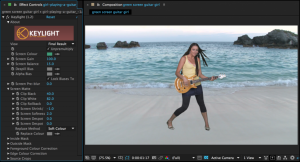
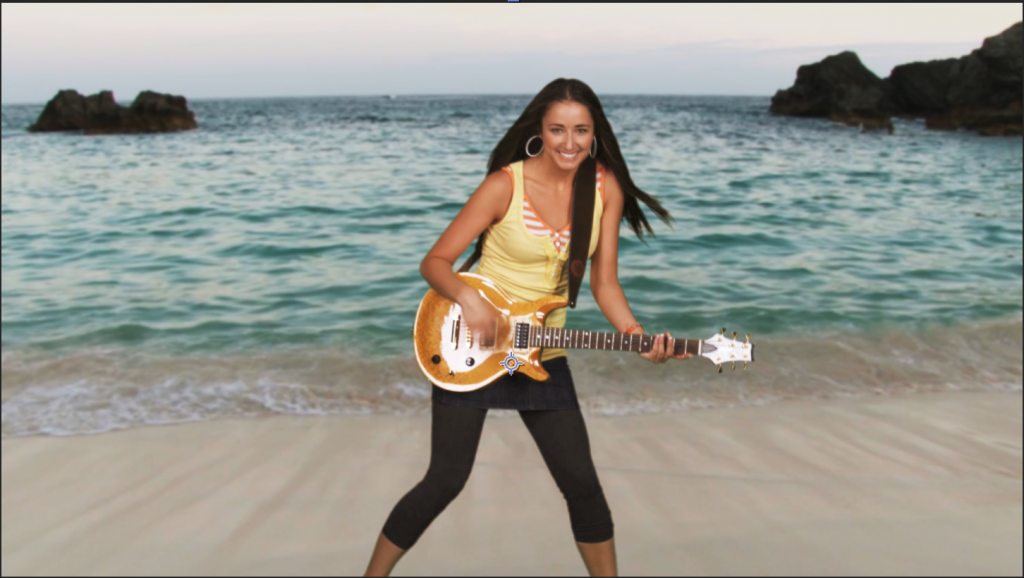
Once everything looks good, switch your view back to “Final Result.” To fine-tune the final image, you can adjust the “Screen Shrink/Grow” and “Screen Softness.” If you set the “Screen Shrink/Grow” to a negative number, it will bring in the keyed edge. “Screen Softness” will soften the edge.
With the key done, you can add color correction effects, blurs, adjustment layers, and transform properties to meld the green screen footage and the background together. Remember to pay attention to perspective and that adding a slight blur to the background can help it look more natural.
Advanced Presets
The technique outlined above should generally give better results than we were able to achieve using Premiere Pro’s built-in chroma key functionality. However, you still may have trouble pulling a completely clean key all the time – green screen compositing can be challenging even when using advanced software like After Effects. The most common areas of trouble are “chatter” in the keyed image, fringing around the edges, and unwanted color casts. To fight these, After Effects includes a set of effect presets that work in conjunction: Keylight, Key Cleaner, and Advanced Spill Suppressor.
Begin by using the same masking technique as before, cropping around your subject and animating the mask as necessary to account for movement within the frame. When you are ready to add the Keylight effect, however, don’t choose it from the Effects drop-down menu; instead, type “key” into the Effects search bar. In addition to the standalone Keylight effect, you should see “Keylight + Key Cleaner + Advanced Spill Suppressor” listed under “Animation Presets.” Drag this preset onto your footage.
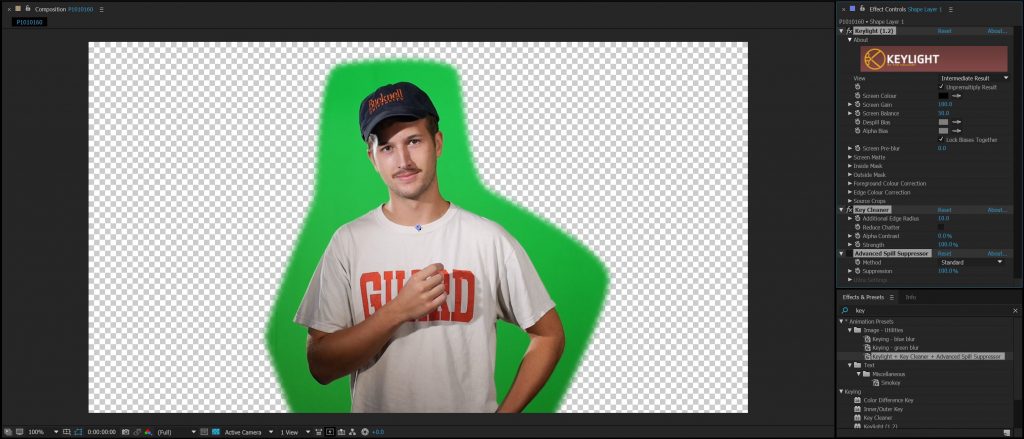
You should now have three effects added to the layer, although the visibility of the Advanced Spill Suppressor is turned off initially. If you look closely at the settings of the Keylight effect, you’ll also notice that the view is set to “Intermediate Result” instead of “Final Result.” This is because of the way the three effects work together.
Keylight is the first of the three effects you should make changes to and the process is basically the same. Switch the view to Screen Matte, make tweaks to the Screen Gain and Screen Balance, then clean up the problem areas using Clip Black and Clip White. Flip the view back to Intermediate Result (not Final Result) and make any necessary adjustments to Screen Shrink/Grow and Screen Softness to clean up the edges of the key. However, don’t worry about it too much if there is still some colored fringe on the edges – the other two effects will help with that.
The Key Cleaner will do two things: help refine the edge of your key and reduce “chatter.” Chatter is the noise pattern that sometimes appears in keyed footage, often in dark areas. To remove it, simply click the “Reduce Chatter” check box. The other parameters in Key Cleaner affect the key’s edges; try sliding them back and forth and see what the results are. I tend to leave the settings fairly close to the defaults, only making slight tweaks.
You may still have some faint green fringing on your key. To remove this, turn on the Advanced Spill Suppressor by clicking the blank box next to its name in the Effect Controls panel. Remember that “on” effects have an “fx” icon next to them. The standard settings for Advanced Spill Suppressor are incredibly simple: once the effect is turned on, you should see an immediate effect. If too much green is being taken out of the image, turn down the “Suppression” setting. Most of the time, that’s all that you need to do. If you aren’t getting the result you want, you can switch the method from the standard settings to “Ultra.” This will give you a handful of parameters to adjust and play with. If you still aren’t getting a clean key, you may need to refine something earlier in the process, such as the animated matte or the parameters in Keylight.
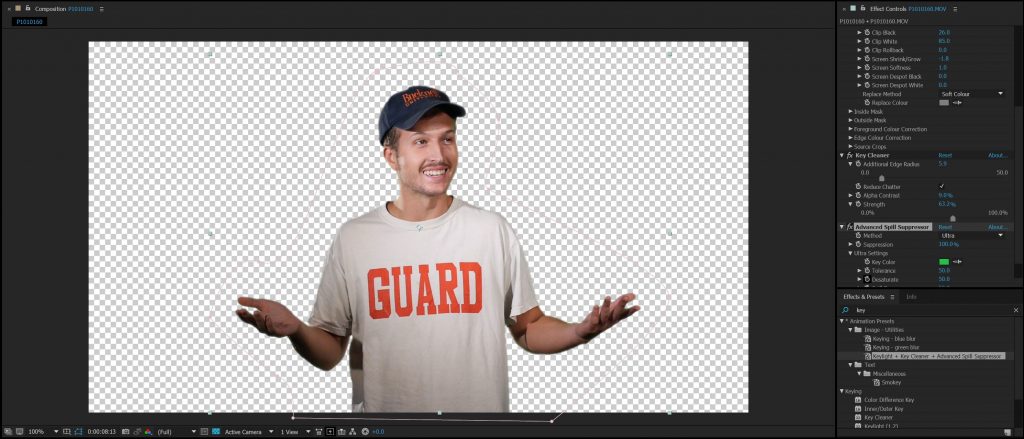
You should be able to get a clean key on just about any reasonably well-shot green screen footage using this method. Once you have your footage keyed out, you can get creative with compositing and color grading. One trick that I sometimes use is to duplicate the background layer and place it over the keyed subject. You can then blur it way out and lower the opacity down to maybe 10 or 15%. This will give a faint color cast to the subject and help them seem like part of the background environment. This trick isn’t always appropriate, but it is often useful.

Project 8: Make It Spooky
Remember the green screen footage we shot way back in Week 5? It gave us problems in Premiere Pro, but I’m confident that the tools in After Effects are more than enough to handle it. Choose one (or more, if you feel up to it) of the clips in this folder to composite using one of the methods described above. You may be able to key the footage using only Keylight, or you may need to use the preset trio of keying effects. Experiment and see what works.
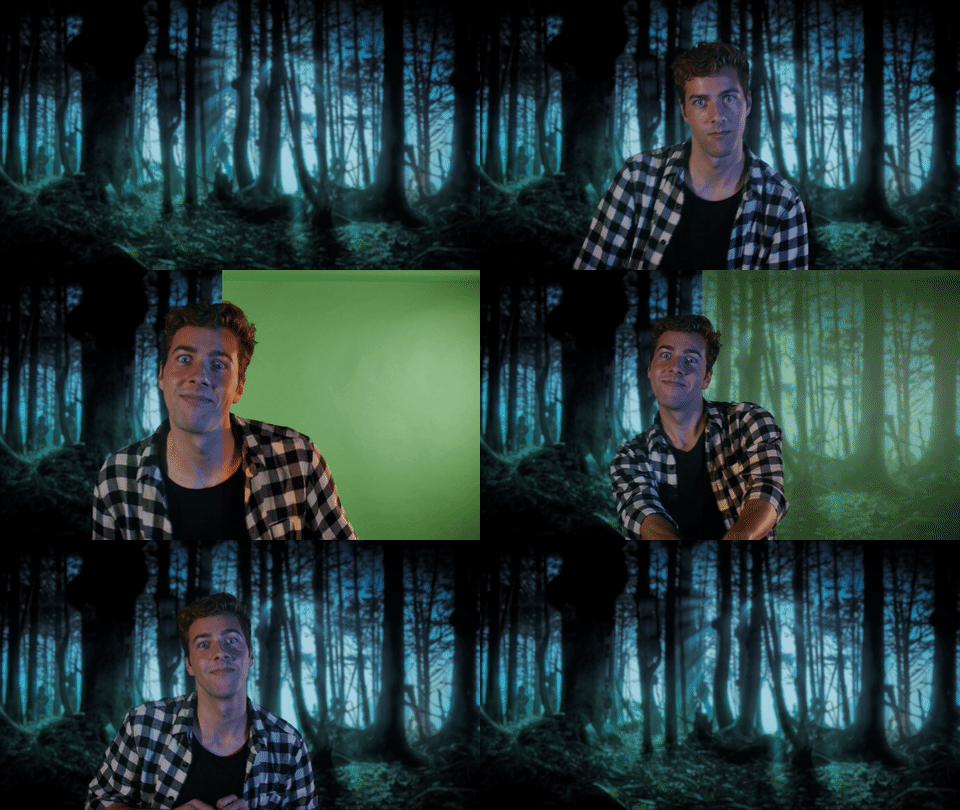
Since this is the last class before Halloween, I want you to create a spooky scene from the composited footage. You could use a dark cemetery background or an abandoned asylum. You could make your shot look all grainy and found-footage-style or you could go for classic Hollywood horror in black and white. It’s up to you.
This assignment has two goals. The first is to get a really good, clean key from the footage. The second is to make your compositing and color work cohesive and atmospheric. Remember to use adjustment layers and color grading to tie everything together. If you aren’t happy with the color correction tools in After Effects, feel free to export your video and make final adjustments in Premiere. Upload the footage and send me the finished result. Have fun and make it spooky!
https://youtu.be/zcAdBhbbEfs
https://youtu.be/OlBrgypxlEo
https://youtu.be/VIzF2CatKfU
https://youtu.be/oxt60VTKrgs